How to Get Started
- Login to ARROW at http://arrow.wisc.edu (using your NetID and password).
- Confirm you are logged in under your “IRB Member” role.
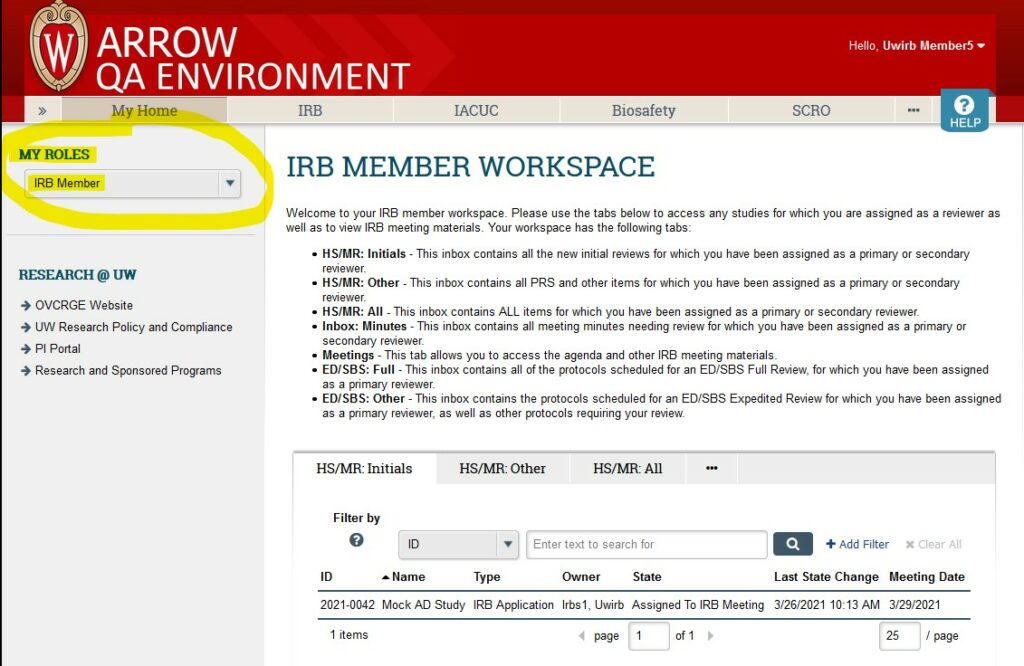
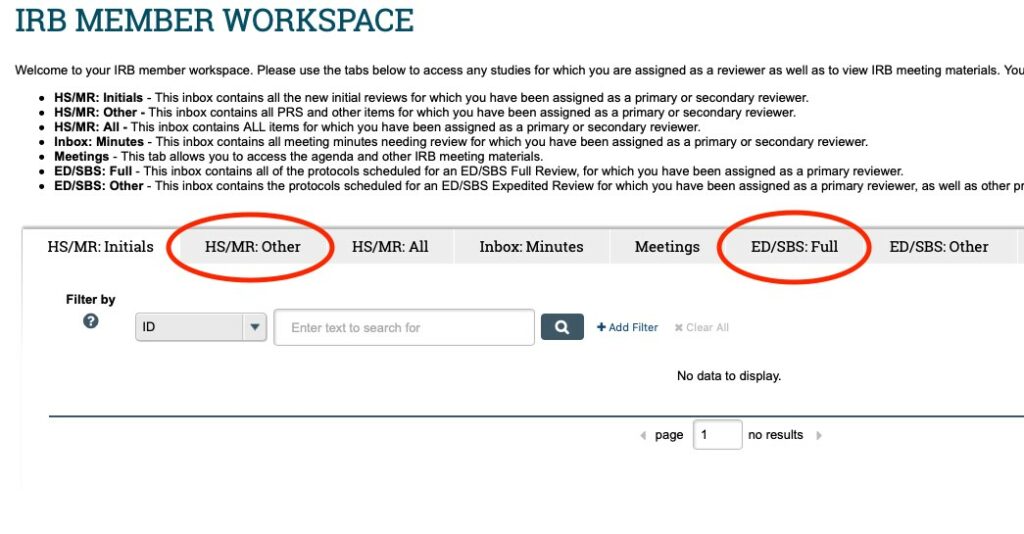
- Click on the “HS/MR: Other” or “ED/SBS: Full” tab to view the items that have been assigned to you for review. To access the full meeting agenda (and all the submissions assigned to that meeting) see IRB Member Workspace Navigation Guide for IRB Members.
- Click on the name of the Change of Protocol to be taken to the CHANGE OF PROTOCOL WORKSPACE.

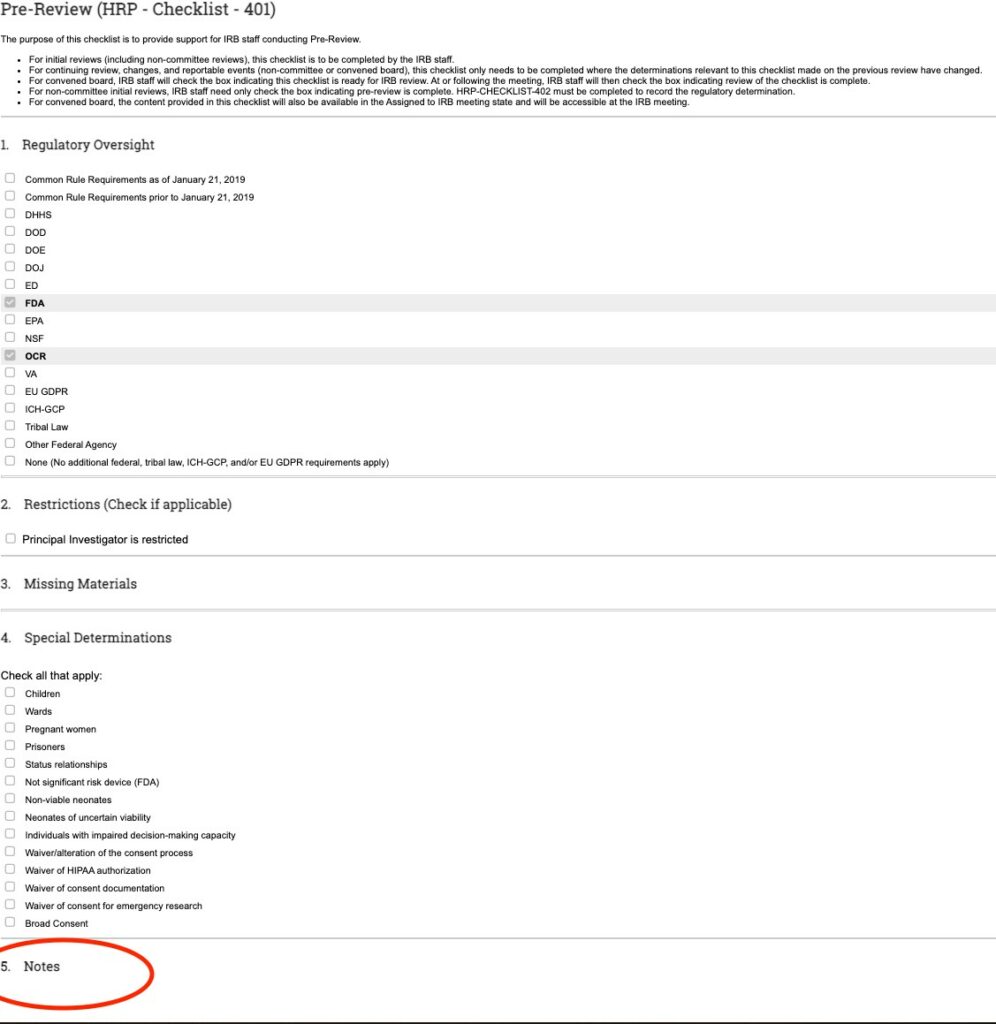
- Once in the CHANGE OF PROTOCOL WORKSPACE, look through the activities logged under the HISTORY tab. FIRSTLY: Look for the “Pre-Review Checklist Prepared” activity. If it is present**, click on the words “Pre-Review Checklist Prepared” to open the HRP-401 Pre-Review checklist.
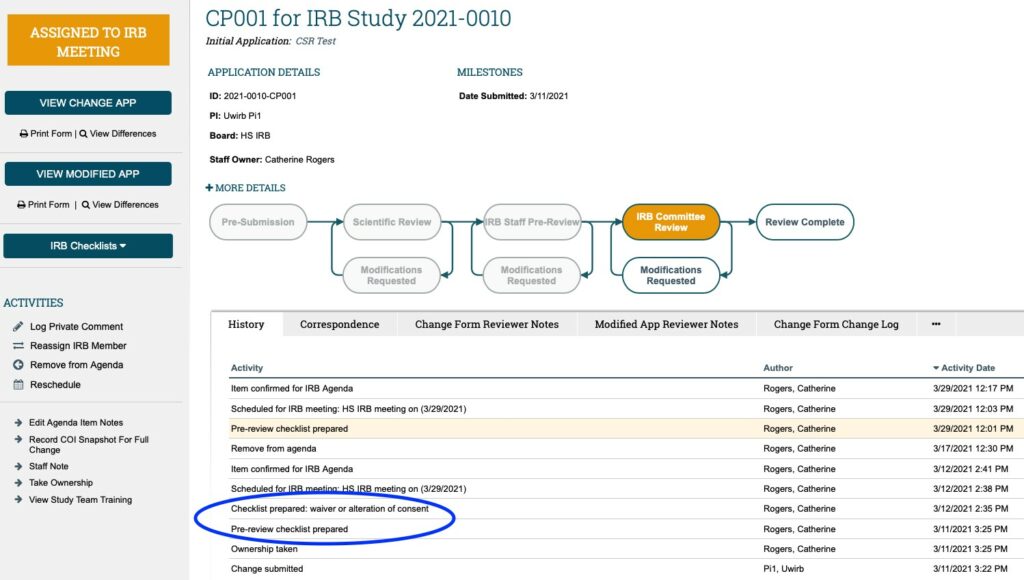
Note: You may NOT see a “Pre-Review Checklist Prepared” activity in the History tab depending on what is being modified with the CHANGE OF PROTOCOL. If no HRP-401 Pre-Review Checklist was completed this means none of the regulatory determinations documented in HRP-401 are being modified and/or there are no notable issues (as documented in section #5 “Notes”) as part of this CHANGE OF PROTOCOL . If this is the case; proceed to step #7 below.
If there is a completed HRP-401 Pre-Review Checklist, review its content (as always, paying attention to anything documented in section #5, the “Notes”).
- SECONDLY: Review any additional checklists. Depending on the nature of the proposed change; there may be additional supplemental checklists prepared. For example, in the screenshot below, the “Waiver or Alteration of Consent” checklist was also prepared. This means; as part of this change, the study team is requesting to add either a waiver of informed consent or an alteration of elements of informed consent and you would need to open the checklist to review the nature of this request. Any additional checklists that are prepared will appear in the History tab near the “Pre-review checklist prepared” activity.

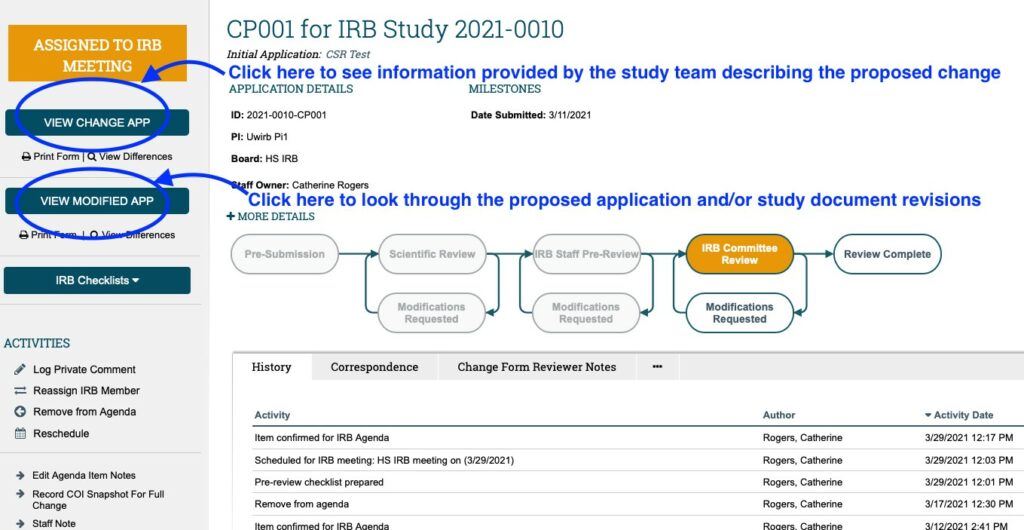
- THIRDLY: Once the checklists have been reviewed, review both the CHANGE OF PROTOCOL APPLICATION and MODIFIED APPLICATION. Click on the “View Change App” button on the left-hand side of the screen to view the CHANGE OF PROTOCOL FORM which contains information provided by the Study Team summarizing the proposed changes (e.g. summary of proposed changes, justification for changes, impact on study consent forms/process, etc.).
Click on the “View Modified App” button located below and it will take you to the Modified (Main) Study Application which contains all proposed changes to the Main Study Application itself; as well as any revisions to study documents.
- Use the “Continue” button (or “Jump To” menu) to navigate both the change form and the modified application.
- When finished reviewing the change form or modified application, click “Exit” to be returned to the CHANGE OF PROTOCOL WORKSPACE.
- FINALLY: You can also see how the ARROW system tracks the changes made to the MODIFIED APPLICATION by clicking on the button labeled “View Differences” under the “VIEW MODIFIED APP” button. The “MODIFIED APPLICATION” is a COPY of the currently approved Main Study Application… that the study team can then EDIT to reflect the modifications to the application they are proposing as part of the CHANGE OF PROTOCOL.
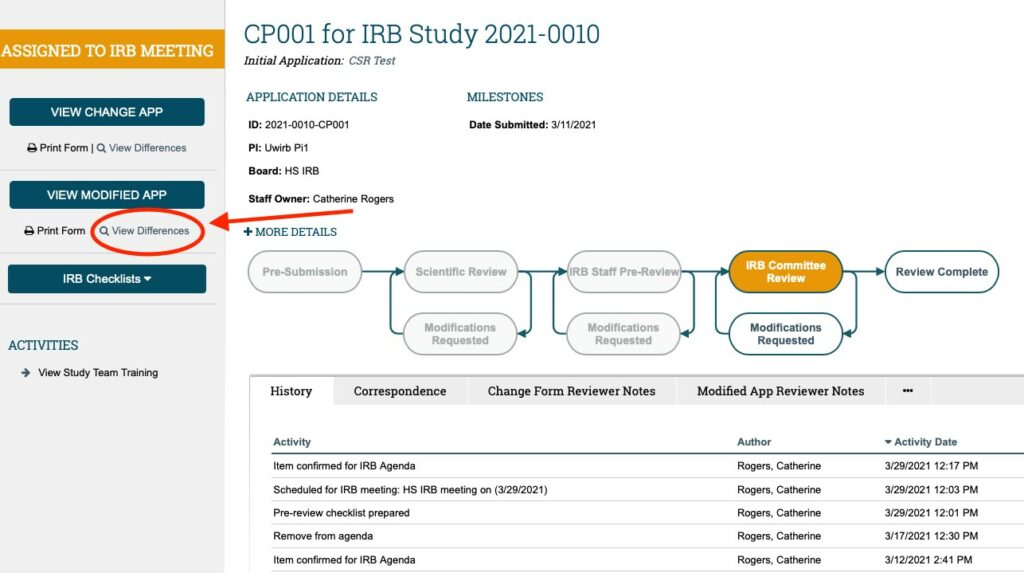
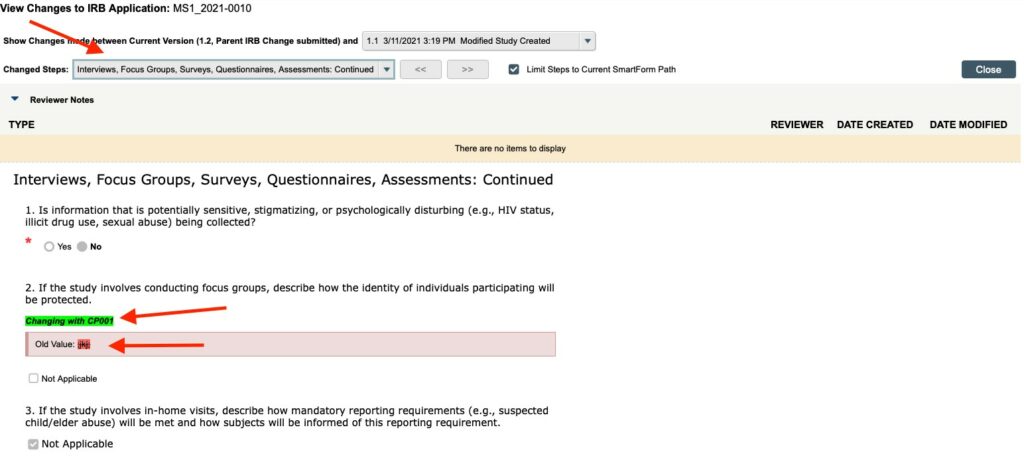
Clicking on “VIEW DIFFERENCES” under the “VIEW MODIFIED APP” button will show you the difference between the information documented in the currently approved application (shown in pink boxes with “Old Value” before the currently approved text highlighted in RED) and the proposed changes that are being requested as part of the CHANGE OF PROTOCOL** (highlighted in GREEN).
**The changes made to the MODIFIED APPLICATION are broken down into “rounds” as shown below with the red arrows. The drop down menu that shows you what “round” of edits (made to the MODIFIED APPLICATION) you are looking at. Each “round” (identified as a different version number) is showing you the changes made during one review “exchange” between the Study Team and the IRB. You will need to look at all the “rounds” in order to get the FULL picture of all the changes being requested as part of the CHANGE OF PROTOCOL.


The “Changed Steps” menu allows you to jump to the different sections of the application (using the >> and << buttons) where the changes for that “round” were made (allowing you to avoid having to scroll through any un-edited pages of the application). Once you have finished reviewing the application differences, you can exit the using the “Close” button near the top right-hand of the screen. This will take you back to the CHANGE OF PROTOCOL workspace.
Additional Navigation Tips from the Change of Protocol Workspace
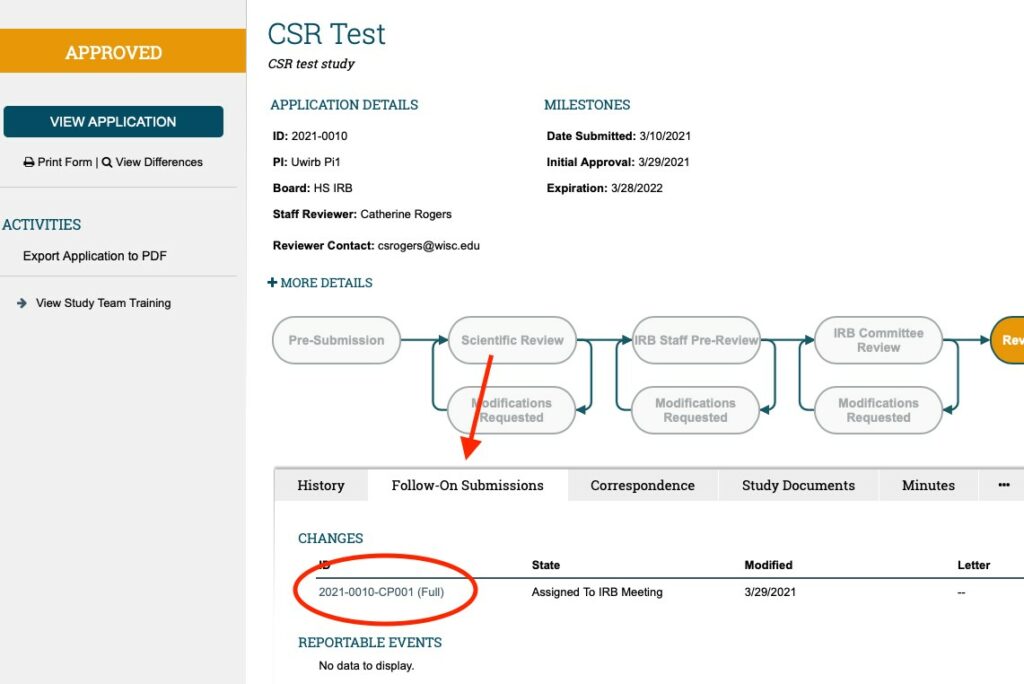
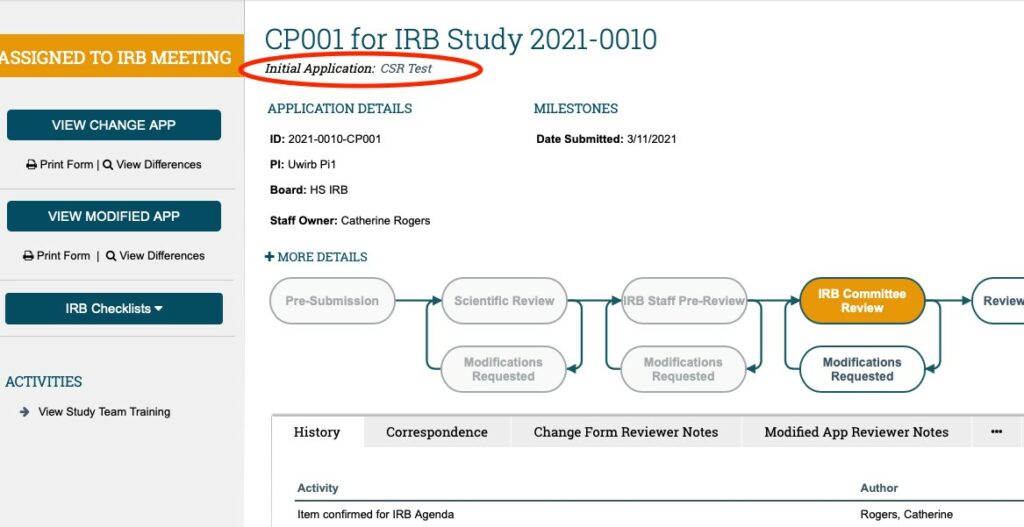
To access the MAIN STUDY WORKSPACE from the CHANGE OF PROTOCOL WORKSPACE, click on the STUDY TITLE (in italics) written under the CHANGE OF PROTOCOL title.
Once in the MAIN STUDY WORKSPACE; you can access the currently approved MAIN STUDY APPLICATION using the “VIEW APPLICATION” button in the upper left-hand corner under the gold “APPROVED” bar. You can access any of the currently approved study documents WITHIN the MAIN STUDY APPLICATION (by scrolling through the approved application using either the “continue” button or “jump to” menu); OR you can access them in the STUDY DOCUMENTS TAB** (as shown in the screenshot below).
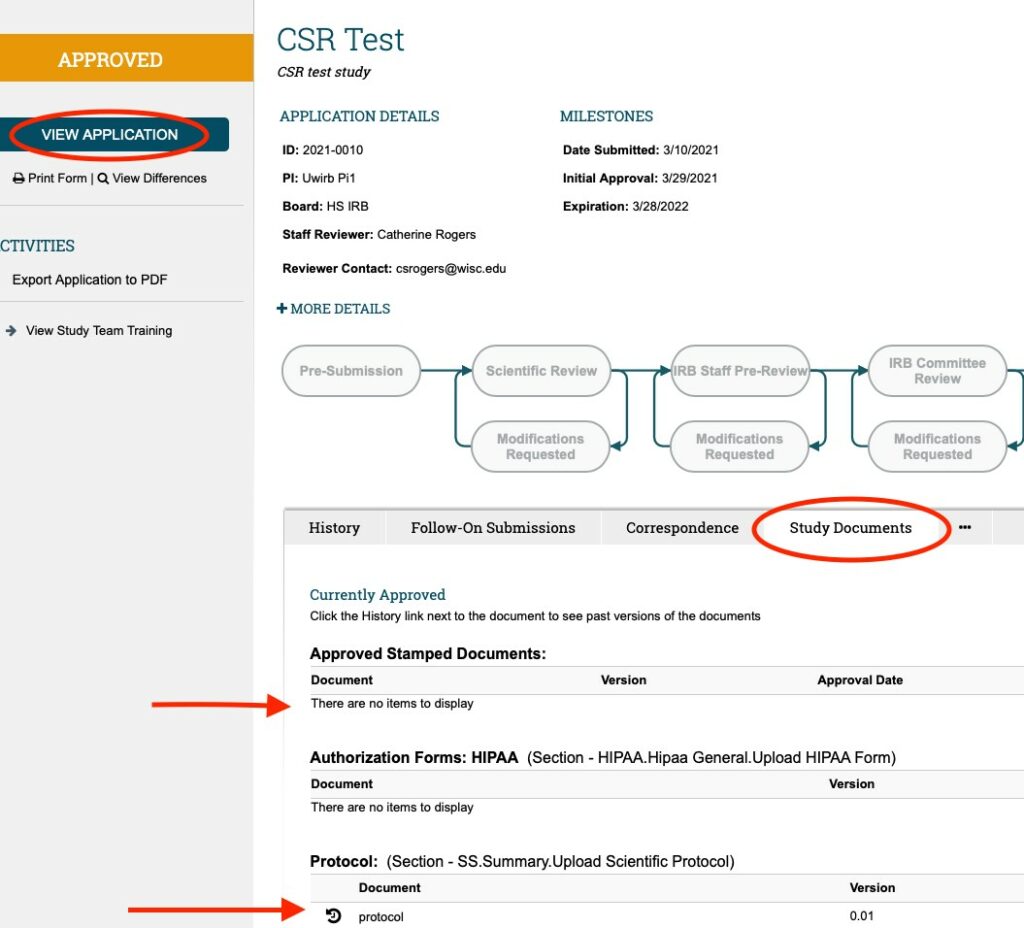
Note: Not all documents provided with the application will be found in the STUDY DOCUMENTS tab (some will need to be accessed within the Main Study Application)
To get back to the CHANGE OF PROTOCOL WORKSPACE from the MAIN STUDY WORKSPACE; click on the “FOLLOW-ON SUBMISSIONS” tab (located next to the “History” tab which is the DEFAULT tab that is open when any submission is first accessed); and find the CHANGES section (first section of the “Follow-on submissions” tab) and find the CHANGE OF PROTOCOL ID for whatever COP submission you wish to access.